Go to the LMS:
1. Go to the login page
2. Click on forget password
3. You will receive an email with a link
4. Click on the link and enter your new password
5. Once updated, you may now use the new password to login
When you launch a module in a lab, you will see the instructions on the left.
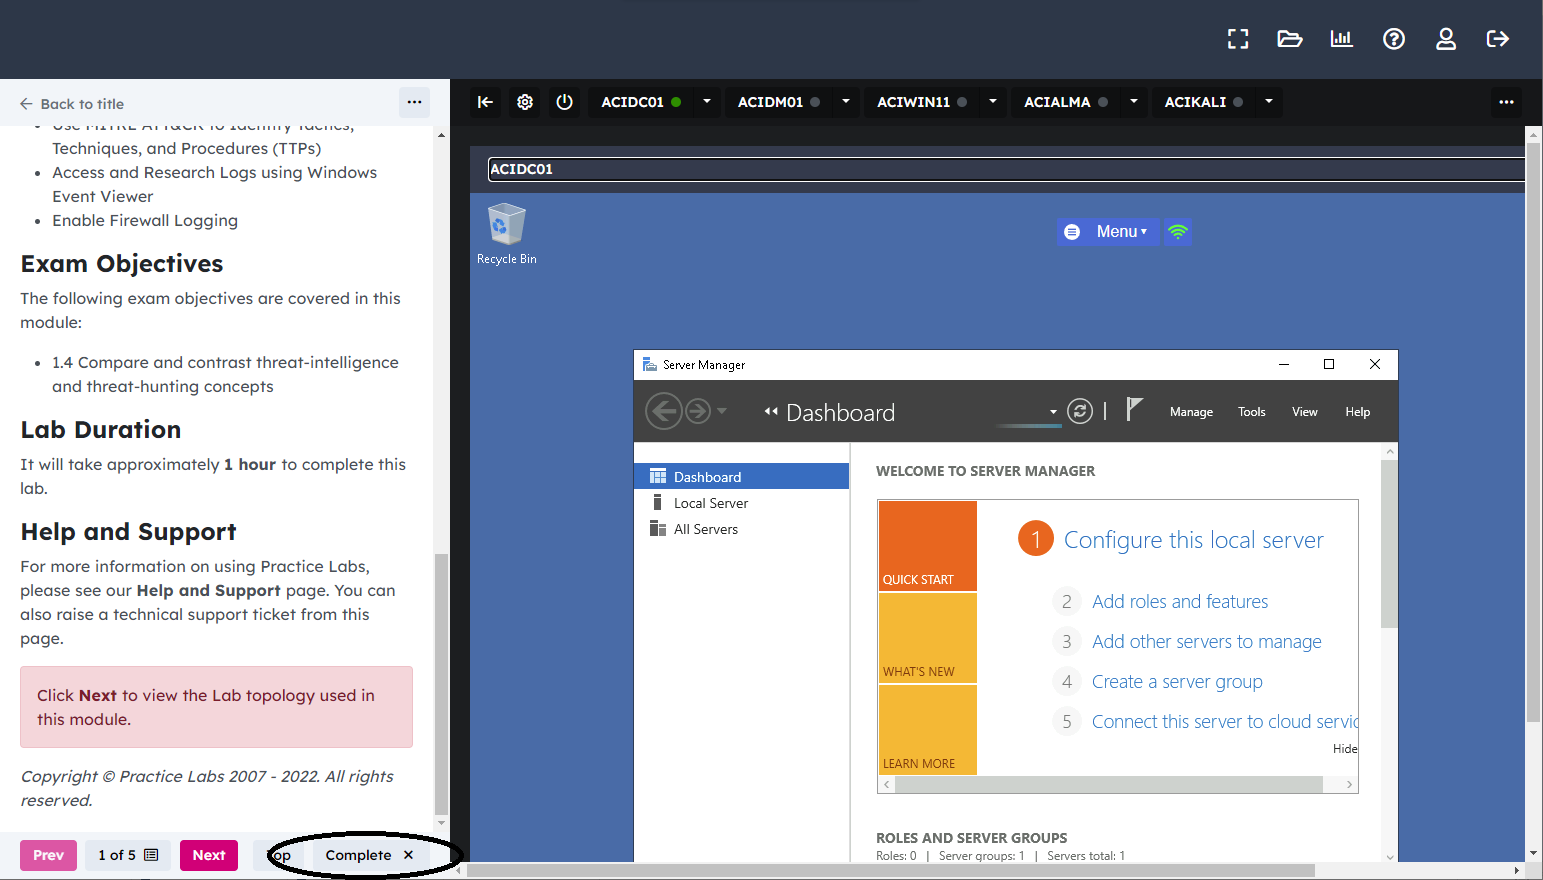
On the bottom of the instructions, next to the “Prev”, “Next”, and “Top” buttons, is the “Complete” button.

Hit the “Complete” button to mark a lab as Complete (the button will turn green and the x will become a checkmark.)
The labs operate through a 3rd party app and unfortunately, does not communicate directly with our LMS System. Sometimes after students click the “Practice Lab Course”, it automatically marks it as “complete” even if it is not. To better verify this, we can check what the student had done so far by clicking on their “Practice Lab Course” section which should show all the labs they’ve done so far as well as those that are complete and not yet completed.
You may send your admission rep a screenshot of the issue that you are having, details regarding the issue/s, name of the lab, information about the computer or device you are using as well as browser that you used when you encountered the problem.
After sending these information, please email Practice Lab Support at [email protected] as well so that they could look further into the issue or you may also call them at 612-200-0993.
Please be aware that it can take up to 24 hours to get a response back from your email.
You may experience the following issues when trying to boot their laptop
- Laptop does not power on even after pressing the power button
- Laptop does not power on after unplugging the charger/power adapter
- Windows is stuck in the startup recovery mode and user is unable to reach the desktop
No power to the laptop after trying to turn it on with the power button….
- In most cases, you can hold the power button down for 60 seconds, then release it…this should power the laptop.
- If not, try to unplug the laptop from the power adapter, hold the power button down for 60 seconds, then plug then the power adapter back into the laptop.
- If all fails, it could be that a CMOS battery has failed. In that case the battery would have to be replaced by opening the bottom and locating the battery and then replace it.
- In most cases, you can press and hold the power button down for 60 seconds and then release it. This should power the laptop.
- If the previous troubleshooting method does not work, please unplug the laptop from the power adapter, press and hold the power button
down for 60 seconds and then release it. Plug in the power adapter back into the laptop. - If all the previous troubleshooting still fails, this could be due to a CMOS failure. The CMOS battery would need to be replaced by opening the back panel of your laptop, locating the CMOS battery and replacing it. Please make sure that the laptop is not plugged in to the power adapter while doing so.
- Please unplug the laptop from the power adapter, press and hold the power button down for 60 seconds and then release it. Plug in the power adapter back into the laptop.
This could happen if Windows performed an update and the system was abruptly powered off during the process, especially when Windows is showing the “Please do not turn off your computer while Windows is finishing the update” warning. In such cases, force your laptop to shut down 2 times until you get to Windows Troubleshooting the next time you attempt to boot again by pressing the power button and holding it down for 30 seconds. Once you get to the Windows Troubleshooting option, select “Advanced Options” and you may attempt the following options:
Startup Repair
System Restore and perform a system restore from a date before you encountered the problem. If System Restore is successful, please uninstall any updates that was recently installed.
Reset this PC and select “Keep my files” option.
If all of those still fails, you will need to create a USB Bootable Device from Microsoft’s website, boot your laptop from the USB Bootable Device that you created, and on the installation window, select “repair”. For more information on how to create the USB Bootable Device, you may visit the link below:
https://support.microsoft.com/en-us/windows/create-installation-media-for-windows-99a58364-8c02-206f-aa6f-40c3b507420d
If that still doesn’t solve the problem, you will need to reinstall your Windows Operating System using the same USB Bootable Device that you created.
Open your browser and visit this link:
https://support.microsoft.com/en-us/windows/create-installation-media-for-windows-99a58364-8c02-206f-aa6f-40c3b507420dYou must have a USB flashdrive device ready that is at least 32GB in capacity
You will also need to have different computer or laptop where you can download the files required in the process and where you could create the USB Bootable Device
Choose Windows 10 or 11 as the Operating System
Place the USB flashdrive into the computer’s USB port, double-click on the file you downloaded from the previous link to create the USB Bootable Device.
Once successfully created, safely remove your USB flashdrive, unplug, and take it to your laptop. Restart your system and wait for it to boot from the USB Bootable Device. In some cases, you may need to go to the laptop’s BIOS first and select your USB Bootable Device.
In the setup screen, you will see “partitions”. Please delete all of the existing partitions that you can find, then select “create a primary partition” using the entire Hard Drive space available, and let the installer manage the partitions.
Proceed with the installation and accept the default settings as you go through the installation wizard and process.
Once you reach the desktop again, this means that the reinstallation of your operating system is complete.

- If student is having trouble accessing LMS via Microsoft Edge browser, they can download Google Chrome or Mozilla Firefox…
- Use this link https://www.google.com/chrome/
- And click download chrome button